Echo Quilting
Contents
- Overview
- Tracing the Shape
- Create Echo Lines
- Adjust Echo Lines
- Clipping Echo Lines
- Sewing Echo Lines
Overview
Creating echo lines (around an applique, for example) is easy with IQ. Follow the steps below to create perfectly spaced contours around a shape that you trace (or mark) with IQ.
Tracing the Shape
First, trace your shape so IQ knows what to echo:
- Design/Sew Quilt
- Start New
- Block Pattern > Trace on Quilt
- Trace your shape with the needle (I like to turn the power off to the longarm and lower the needle so its just skimming the surface of the fabric - that way I get a nice clean shape). Alternatively, you can use Mark on Quilt if you aren't good with tracing.
- Now you have a block that looks just like your shape you've traced.
Create Echo Lines
Next create the contour lines (echoes):
- Add/Edit Block
- Convert to Pattern. IQ will let you select a shape to change into a pattern. Choose the one you traced. Note that your tracing is now a pattern.
- Add/Edit Pattern
- Add Pattern
- Select the type of pattern you want to add. In this case, Echo Pattern is what we want.
- IQ will ask you to select a pattern to echo. Touch your pattern, and a green contour line will appear.
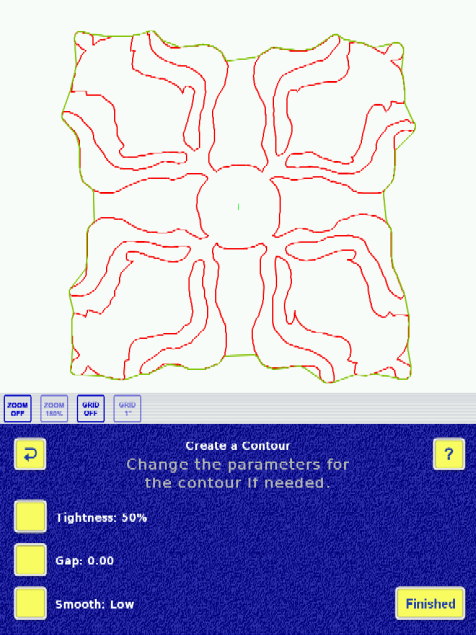
- Adjust the contour lines to your liking, using the Tightness, Gap, and Smoothing buttons (see below for information). To make multiple contours, repeat steps 2-8 until you have enough contours.
Adjust Echo Lines
Adjusting your contour lines is easy.
Tightness is an indication of how tightly the contour will follow the original shape. For the first contour, you probably want to put that number at 100%. As you move out from the original shape, that number may need to come down to smooth out the echo lines.
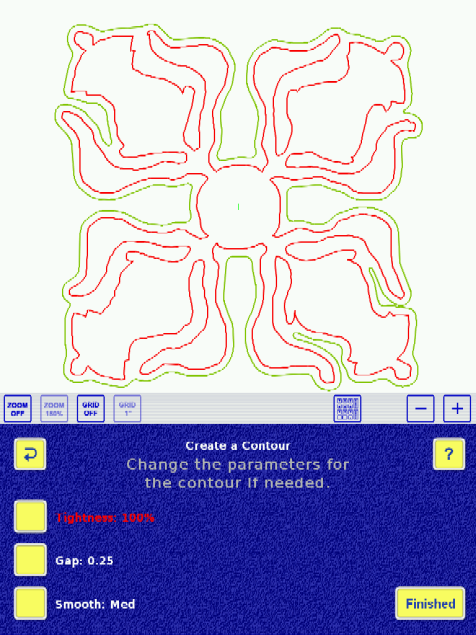
Gap specifies the spacing between contour lines. 0.25 is 1/4" spacing; 0.5 is 1/2" spacing; etc. Set this however you like.
Smooth has four choices: Low, Medium, High and None. Try each one and see what happens. Basically, this function allows you to choose how "flat" you want the echo lines. None disables smoothing.
Clipping Echo Lines
You can clip your echo lines, for example, where they intersect a pieced block. To do this, set up all your echo lines (contours), extending them out as far as they need to go to achieve the desired number of echoes.

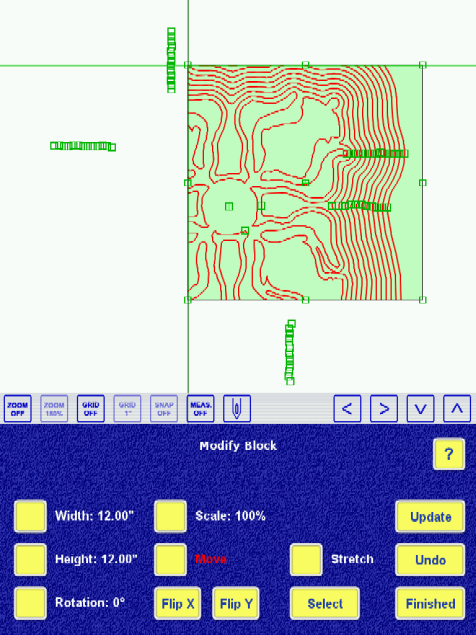
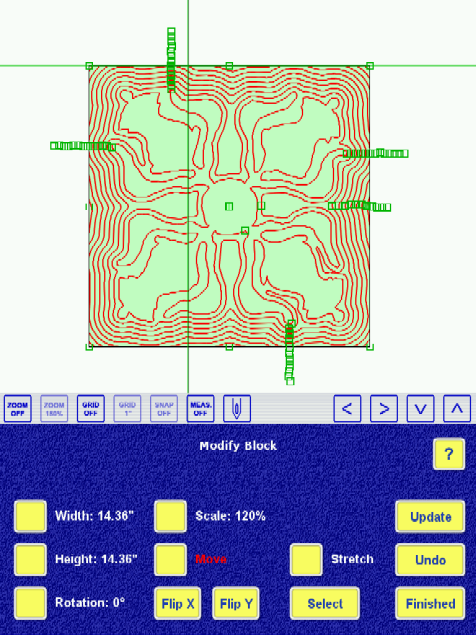
Now set up a New Block > Clipping Block. IQ asks which patterns are to be affected by the clipping block and allows the user to choose how to define the block. Use the method that suits the quilt. IQ will take you into Modify Block, where you can adjust the placement and size/shape of the block.
Selecting all the patterns to be affected:

The Modify Block screen, where you can adjust the clipping block:
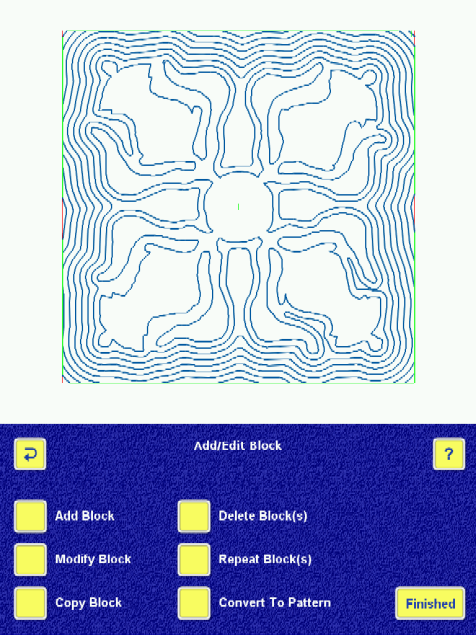
Final location of the clipping block, which was moved by dragging it to snap to the center of the image:
You can also convert your Clipping Block into a pattern for IQ to stitch (useful for stitching in the ditch if you used Mark on Quilt). I would stitch the clipping block pattern first, as a stabilizing agent for your quilt.
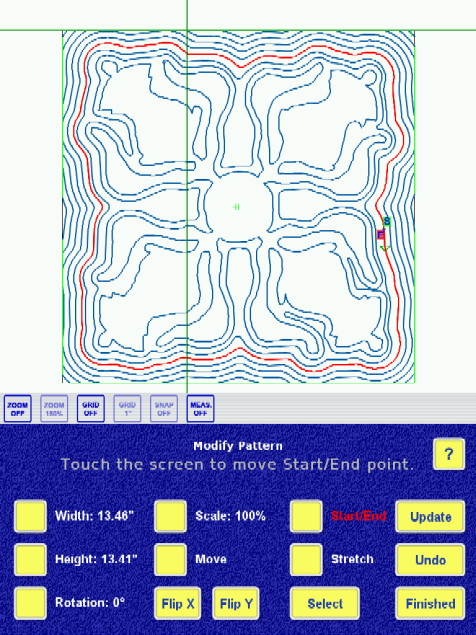
Sewing Echo Lines
When you've finished creating the echoes, IQ will require a choice for transitioning between each contour line. The Transitions article describes the options. Spiral is a choice that is unique to echo patterns, and this will create continuously spiraling echoes so there is only one start and one stop. When this option is chosen, you can move the location of start to make a pleasing echo.